Someone else is currently editing this document
Only one person can work on a document at a time
TRANSCRIPTION
Language(s) of Transcription
ABOUT THIS DOCUMENT
Document Date
Document Type
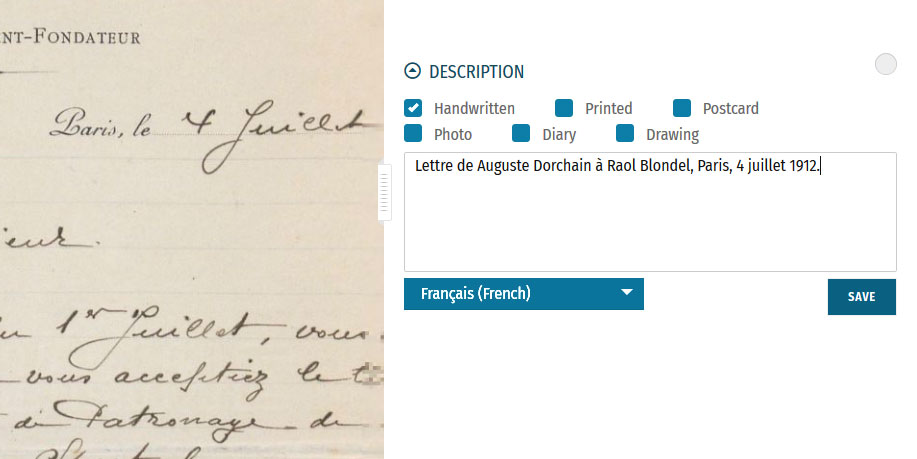
Document Description
Language of Description
Keywords
External Web Resources
People
STORY INFORMATION
Title
FRBDIC- 11 Histoire de Louis Carette | capitaine d'infanterie puis instructeur détaché aux Armées américaines
Creator
Louis Carette
Source
UGC
Photograph
Book
Contributor
europeana19141918:agent/1621a5939900e8e809011721d227bf8e
Date
1918-11
1914-08
Type
Story
Language
eng
fra
Français
English
Country
Europe
DataProvider
Europeana 1914-1918
Provider
Europeana 1914-1918
Rights
http://creativecommons.org/publicdomain/zero/1.0/ http://creativecommons.org/licenses/by-sa/3.0/DatasetName
2020601_Ag_ErsterWeltkrieg_EU
Begin
1914-08
End
1918-11
Language
mul
Agent
Louis CARETTE | europeana19141918:agent/150f1fcc77f641b24a24c4c1ec6283fa
M. Bernard GEORGE | europeana19141918:agent/1621a5939900e8e809011721d227bf8e
Created
2019-09-11T08:16:05.037Z
2019-09-11T08:16:04.990Z
2018-07-26 10:24:21 UTC
Provenance
FRBDIC
Story Description
Manuel d'instruction pour élèves officiers, lettres, dessins, photographies, cartes postales.
Louis Carette, mobilisé dès le début de la Guerre au 251e Régiment d'Infanterie, lieutenant, puis capitaine, a combattu sur le front pendant trois ans. Il a été blessé deux fois. Il a servi notamment au Morthomme et à Verdun. Il a reçu à cette occasion une citation, où on le félicite d'avoir su prendre des mesures sages pour tenir sa position tout en limitant les pertes. Il parlait anglais, car il était tailleur de luxe pour hommes : certaines de ses lettres sont d'ailleurs écrites sur papier à en-tête de sa maison (bd Haussmann, Paris). Il a été nommé instructeur, à la fin de la guerre, auprès d'officiers français puis de l'armée américaine. Le mémoire d'instruction qu'il a composé comporte quelques cours en anglais.
Fin dessinateur, il illustrait les lettres qu'il envoyait à sa famille, à son père et à sa femme, pour laquelle il avait la plus profonde tendresse.
Ces documents ont été conservés et classés par sa fille.
Lettre et dessin à l'encre (plusieurs couleurs).
Guerre mondiale (1914-1918) -- Guerre de tranchées
Guerre mondiale (1914-1918) -- Récits personnels
Guerre mondiale (1914-1918) -- France
Guerre mondiale (1914-1918) -- Atrocités
Letter
Récits personnels de guerre, correspondance
Français
Lettre illustrée par un dessin du front de Louis Carette à son père, datée du 25 novembre 1917, montrant un trou d'eau et un cadavre.
Guerre mondiale (1914-1918) -- Campagnes et batailles -- Front occidental
Guerre mondiale (1914-1918) -- Art et guerre
Lettre illustrée par un dessin du front de Louis Carette à son père, datée du 22 novembre 1917, montrant un cadavre partiellement enseveli.
Sanguine
Verso de la lettre illustrée par un dessin du front de Louis Carette à son père, datée du 22 novembre 1917, montrant un cadavre partiellement enseveli.
Ecrite à l'encre
Guerre mondiale (1914-1918) -- Champs de bataille
Women
Nombreuses lettres manuscrites,évoquant ses conditions de vie au front. Cet ensemble est complété par des dessins (notamment pour sa fille), plans de tranchées, ... de la main de Louis Carette.
Guerre mondiale (1914-1918) -- Femmes
Trench Life
Lettres de Louis Carette à sa famille (à son père, à sa femme et à sa fille)
Remembrance
Photograph
Portrait de Louis Carette
Photographie
2 personnages sur la photo dont Louis Carette en costume.
Photographie de représentation de théâtre aux Armées - Chacun pour son grade
Guerre mondiale (1914-1918)-- Pièces de théâtre
Théâtre
48.6752208,5.891161000000011
Un texte de théâtre aux armées, dans le cadre des cours aux élèves officiers. Livret imprimé à Toul en 1918, accompagné d'une photographie d'une représentation.
Toul
Publication
Texte du théâtre aux armées - Chacun pour son grade
Ensemble de 10 dessins (pastel) décrivant des scènes du front.
Les dessins sont datés et en général légendés.
Scènes du front
Ensemble de dessins, réalisés par Louis Carette, montrant des scènes du front (1915-1917)
Drawing
Memoir
Manuel d'instruction
De la Guerre - Cours pour les élèves officiers français et américain écrit et illustré par le capitaine Louis Carette entre 1914 et 1919
Artillery
Livre manuscrit, écrit à l'encre, richement illustré par l'auteur (plans, schémas, dessins), contient une table des matières (quelques titres de chapitres rédigés sous forme de conférences : Les nettoyeurs, Les chars d'assaut, Aérostation, Organisation générale de l'artillerie,De certains principes tactiques toujours vrais, Liste des pièces entrant dans la composition d'un plan de défense, un chapitre en anglais...). Contient des notes confidentielles du G.Q.G,.une photographie prise en avion à Verdun en 1917 collée à l'intérieur, une photographie de l'auteur en uniforme et à cheval, etc.
Tanks and Armoured Fighting Vehicles
TRANSCRIPTION
LOCATION
DESCRIPTION
PEOPLE
STORY INFO
TUTORIAL
English Translation
English Translation
Louis Carette, mobilized at the start of the War in the 251st Infantry Regiment, lieutenant, then captain, fought on the front for three years.
He was injured twice.
He served notably at Morthomme and Verdun.
He received on this occasion a citation, in which he was congratulated for having taken wise measures to hold his position while limiting losses.
He spoke English, because he was a luxury tailor for men: some of his letters are written on the letterhead of his house (bd Haussmann, Paris).
He was appointed instructor, at the end of the war, with French officers and then with the American army.
The instructional brief he composed includes a few lessons in English.
A fine designer, he illustrated the letters he sent to his family, his father and his wife, for whom he had the deepest affection.
These documents were kept and filed by his daughter.
Automatically Identified Enrichments
Verify Automatically Identified Enrichments
Verify Automatically Identified Locations
Verify Automatically Identified Persons
Enrichment Mode
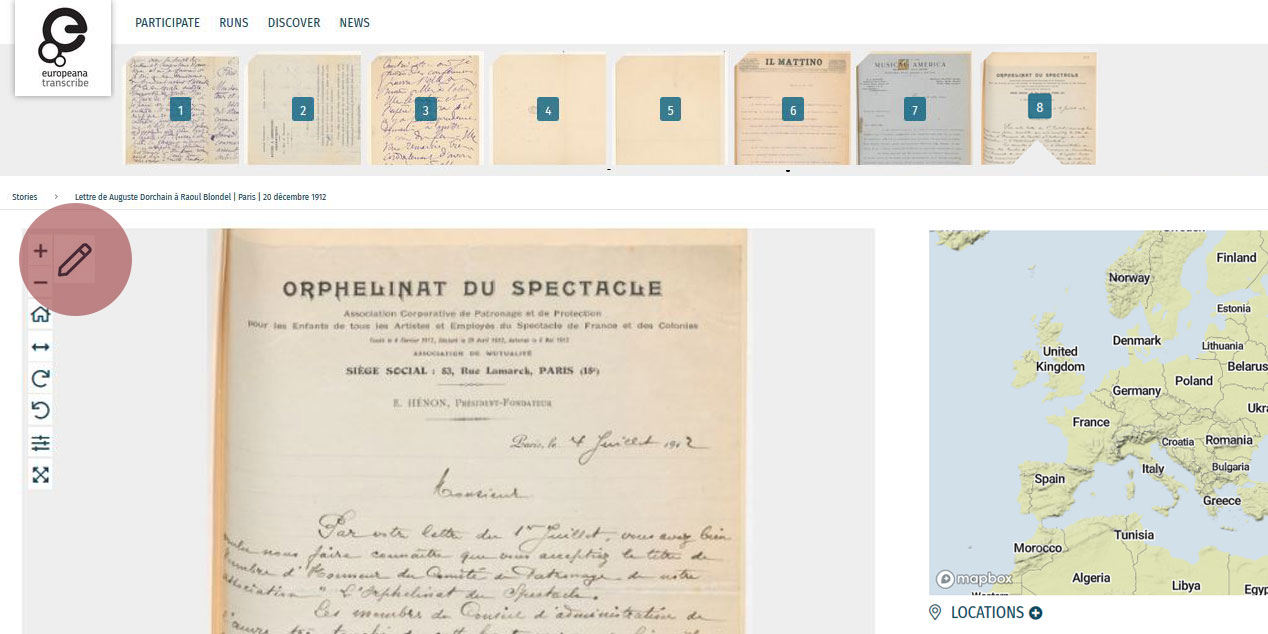
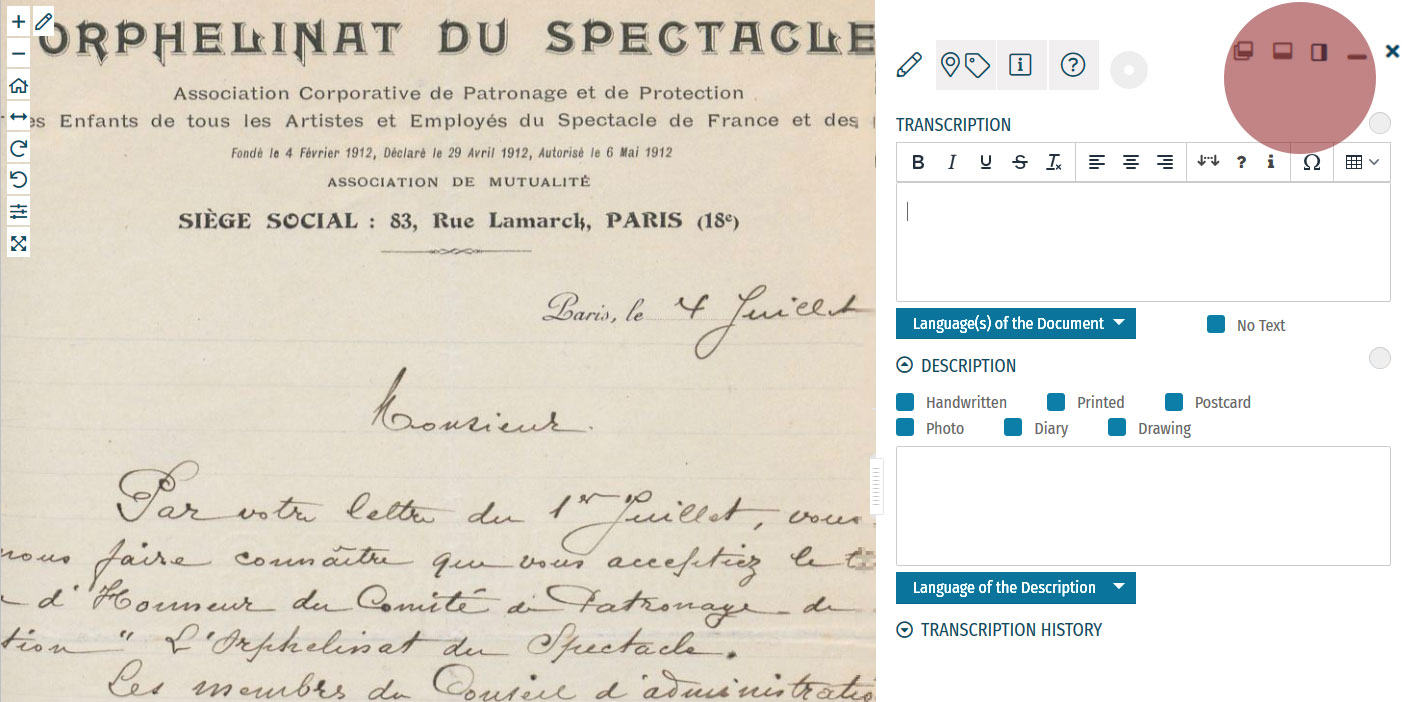
Edit your workspace view by using the top-right menu.
You can have the white Activity Panel docked to the right (default) , to the bottom , or as an independent overlay . If you just want to view the image, you can hide the panel using the minimise button , and then re-open it with the pen button. Adjust the size and position of your Activity Panel according to your preferences.
You enrich documents by following a step-by-step process.
Make sure you regularly save your enrichments in each step to avoid the risk of losing your work.
Step 1: Transcription
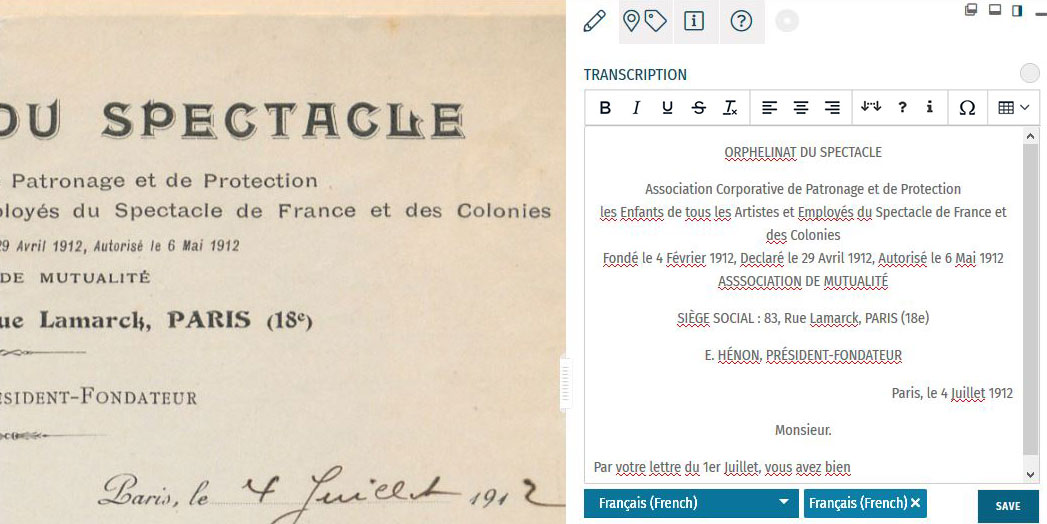
To start a transcription, select the transcription tab at the top menu of the Activity Panel. Click inside the box underneath the heading TRANSCRIPTION and start writing your transcription. When needed, use the toolbar to format your text and to add special characters and tables. A guide to the transcription toolbar is available in the Formatting section of this tutorial.
Identify the language(s) of the text using the dropdown list under the transcription box. You can select multiple languages at once.
If the item has no text to transcribe, tick the checkbox ‘No Text’.
Once you have finished your transcription, click SAVE.
Step 2: Description
You can add a description to the item underneath the Transcription section.
The first task is to identify what type of document the item is: a handwritten or printed document, a postcard, photo, drawing and/or part of a diary. Tick the category which best applies to the item. Multiple categories can be selected at once.
The second task is to write a description of the contents. Click inside the box underneath the heading DESCRIPTION. Here, you can write what the item is, what it is about, and specify the images and objects that appear in the item.
Identify the language of the description text that you wrote using the dropdown list underneath. You can only select one language.
Once you have finished your description, click SAVE.
Step 3: Location
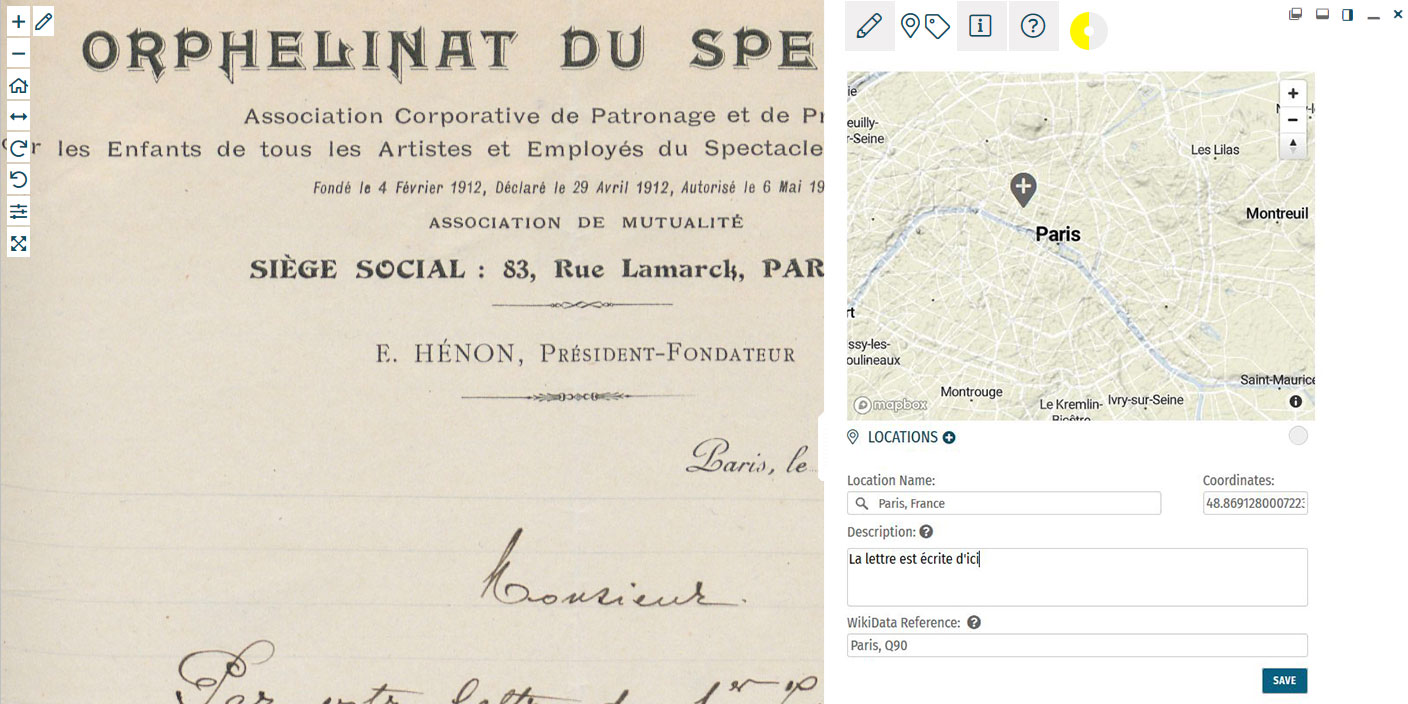
If you find a location mentioned or recognise a place in the item, you can create a geotag and pin it to the item map. Multiple locations can be attached to the item. To tag locations, select the tagging tab at the top menu of the Activity Panel. Click the plus next to the heading LOCATIONS. Type the location into the search bar and select the result that best applies. A new pin will be placed into the map. The location name should be a clear georeference, e.g. a country, city or address. Make adjustments to the location name if necessary. You can also adjust the position of the pin by dragging it on the map. If you want to add further details to the location, you can write a (short) description. This could include extra information about the geotag (e.g. the building name or a significant event that took place at the location) or the relevance of the place to the item (e.g. the hometown of the author). You can also add a Wikidata reference to link the location to a stable source. Search for the reference using the Wikidata fields. Once you have finished your location tag, click SAVE. You can find the place(s) tagged to the item in grey at the bottom of the Location(s) section.Step 4: Tagging
Below the Locations section is the Tagging section, where you can add the following annotations:
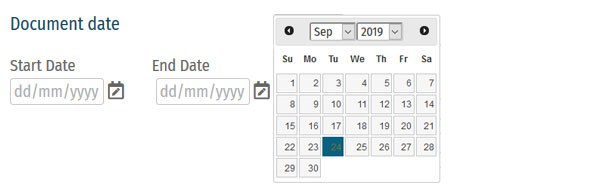 Document Date:
Here, you can add dates that correspond to the item. This could include the dates mentioned in the text (e.g. in diary pages), the date of a related historical event (e.g. the end of WWI), or when the item was created (e.g. from a dated signature on an illustration). You can either define this as a single date or as a longer time frame.
To tag dates to the item, write the start and end dates in DD/MM/YYYY format in the fields or select the dates by clicking on the calendar.
If you only have one date to add, insert the same date into both start and end fields.
If you don’t know the exact days, you can also tag the date on the scale of months (MM/YYYY) or years (YYYY).
Once you have finished your date tag, click SAVE DATE.
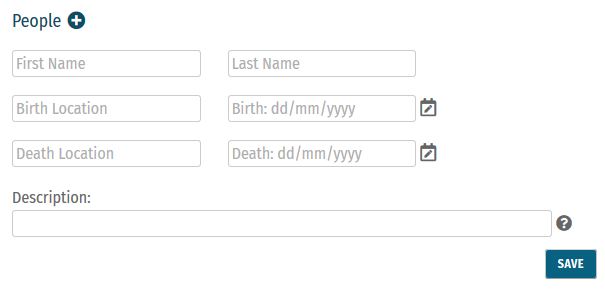 People:
People mentioned as creators or subjects in the item can also be tagged. Depending on the information you might have, you can enter the person’s first and last names, as well as their dates of birth and death. There is also the option to write a short description of the person, explaining who they are or their relevance to the item, e.g. the person’s occupation or their relation to another tagged person.
Multiple people can be tagged to one item.
Once you have finished your person tag, click SAVE.
 Keywords:
Here, you can freely add keywords related to the topic and content of the item. This could include particular themes (e.g. art, music, war), subjects (e.g. children, cooking, France), or particular historical affiliations (e.g. 20th century, Austro-Hungarian Empire, Fall of the Iron Curtain).
Multiple keywords can be added and they can be written in any language.
Write your keyword tag into the field and click SAVE.
 Other Sources:
External websites with information about the item’s content can be linked here. This could include links to further data about a person mentioned, a particular historical event or links to digital versions of newspapers that appear in photos or clippings in a notebook.
To add a link, click the plus next to the heading ‘Other Sources’. Enter the URL into the Link field, and write a short description of this link in the Additional Description field.
Multiple links can be tagged to one item.
Once you have finished your tag, click SAVE.
Step 5: Mark for Review
Once you have saved your contribution, the task will automatically change to the Edit status. If you think the task is finished, you can mark it for review. Note that you have to be at Runner level or above to do this (see: Miles and Levels). Click on the yellow circle next to the section heading and select Review in the list that appears. The task now needs to go under Review by another volunteer.Formatting
Review
 All enrichments need to be edited and reviewed by more than one volunteer to ensure that they are as accurate as possible.
Only Sprinters and Champions can edit tasks in the Review stage and mark them as Complete. (see: Miles and Levels)
You can review a task (Transcription, Description, Locations, or Tagging) when the circle next to the heading is coloured orange .
During the review process, pay close attention to the following requirements:
All enrichments need to be edited and reviewed by more than one volunteer to ensure that they are as accurate as possible.
Only Sprinters and Champions can edit tasks in the Review stage and mark them as Complete. (see: Miles and Levels)
You can review a task (Transcription, Description, Locations, or Tagging) when the circle next to the heading is coloured orange .
During the review process, pay close attention to the following requirements:
-
- Transcription: The complete text in the item has been properly transcribed and the transcription is formatted as accurately as possible. The correct language(s) are selected and the transcription contains no missing or unclear icons.
-
- Description: The description is accurate and detailed (especially items without text to transcribe, e.g. photos), and the appropriate categories have been ticked.
-
- Location(s): All locations have been correctly tagged. The location name is accurate and matches the coordinates and the pin on the map. The description is clear and concise, and the Wikidata reference (if any) is correct.
-
- Tagging: Document dates are completed and as precise as possible. All mentioned people are tagged and their data is correct. All added keywords are applicable to the item, and other sources have accurate information and functioning links.
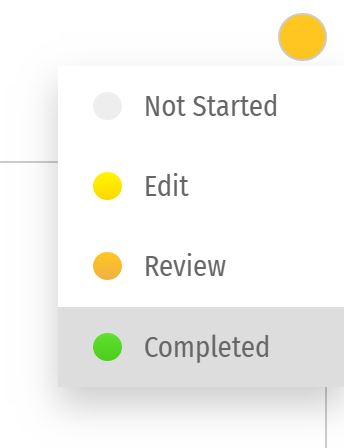
Completion Statuses
| GREY |
| 1. NOT STARTED |
| Tasks have not been started. |
| YELLOW |
| 2. EDIT MODE |
| Tasks have been started, but not yet finished. Additions and edits can still be made. |
| ORANGE |
| 3. REVIEW |
| Tasks are finished, but need final review by Sprinter or Champion transcribers. |
| GREEN |
| 4. COMPLETED |
| Tasks have been fully completed and reviewed. No further changes need to be made. |
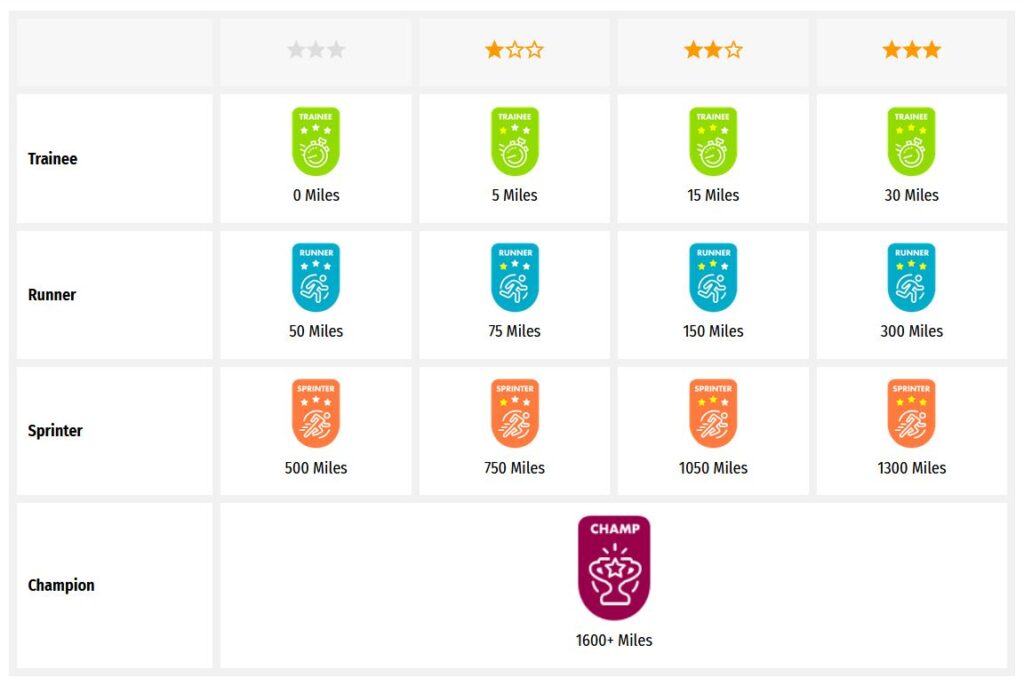
Miles and Levels
Transcribathon is a competitive marathon. You do not enrich documents alone, but compete and work with other volunteers to ensure the quality of your work. When you first create a Transcribathon account, you only have the ability to start and edit tasks. The more you enrich documents, the closer you become to advancing to a higher level, which can unlock abilities like reviewing and completing tasks.| Level | Abilities |
|---|---|
| Trainee | Basic abilities: start and edit tasks |
| Runner | Basic abilities, mark finished tasks for review |
| Sprinter | All Runner abilities, mark reviewed annotations as completed |
| Champion | All Sprinter abilities, mark reviewed transcriptions as completed |
| Tasks | Miles Received |
|---|---|
| Transcription | 1 Mile for every 300 characters transcribed |
| Description | 1 Mile for every 5 Descriptions added |
| Location | 1 Mile for every 5 Locations added |
| Tagging | 1 Mile for every 5 Tags added |
| Reviewing | 1 Mile for every 10 items marked as complete |